Over the course of three classes, I created a still life drawing. After the first two sessions I erased a good portion of what I completed. What I ended up with at the end of the third day was my final product. I didn't get a picture of what I had at the end of day one, but I have pictures of what I had after days two and three.
The Original Still Life
Day Two Images
The apple to the left was one of my favorite parts of the drawing at the end of day two. At the end of the first day I realized it was too small, so I drew it again the second day. At the conclusion of day one, the apple was still very spherical, and that also changed on day two.
This is a flamingo head on day two. This was also something I really impressed myself with. The angle I was working from was difficult. My instructor commented on how I did well creating the depth it needed. There wasn't much about the flamingo that changed throughout my process.
This is what I had at the end of day two before I erased. The right side of the picture is more completed than the left side. At this point, I was still trying to figure out the size of all the objects next to the flamingo. I erased most of that half at the end of the day.
This is a closer look of the half that needed the most work. The object to the right of the flamingo is a light bulb, and to the right of that, another apple. In reality, there was more space between those objects. The angle of the flamingo's neck also needed work.
Day Three Images
This is what I ended up with at the conclusion of day three. Overall I am very pleased with how it turned out.
I used darker lines with the objects closer to the front of the still life, and lighter lines for the objects in the back. It is a good way to attempt to demonstrate depth in an image.
This is the same apple I was proud of on the second day. It had a pine cone in front of it, and I put off drawing it until the last day. It had a lot of detail. My instructor commented on how my first couple of attempts looked too generic and I wasn't paying attention to the specific shapes in the object. He marked three points in the center of the pine cone to help give me a starting point. From there it was easier to pick out the individual shapes without getting lost. I think the end product came out looking much better than my other attempts.
On this half, where I had the most adjusting to do, I was able to create more space between the light bulb and the apple. I also gave the bell pepper behind the pumpkin more of a defined shape. I also added more lines to demonstrate that there was a cloth draped over the table, and drew in the grapes that were there. On the flamingo, I gave the beak and eye more accurate shapes.
The right half of the picture. Since the pine cone came out so dark, I darkened my other lines so it wouldn't seem so out of place. I also added some more grapes.
Comparing days two and three...
Monday, February 28, 2011
Sunday, February 13, 2011
Still Life Project: Pyramid of Skulls
This is Pyramid of Skulls by Paul Cezanne. This is what I will be working on for my project.
I began by sketching out the image.
I started by dividing my paper into four sections to help map out where each skull should be located. Then I sketched out the basic shapes.
Then I added outlines for where the facial features should go.
Then I got more specific with the shapes of the eye sockets and nasal bones.
I gave the skulls more detail as to where the shading would go.
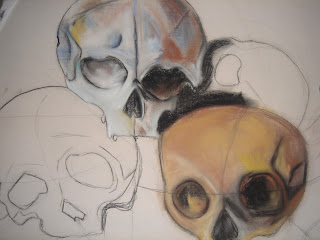
This is the first skull I worked on. Throughout the drawing, I used black and brown Conte Crayons along with chalk pastels.
Next, I started on the shading around the skull in the center and shaded the right eye socket.
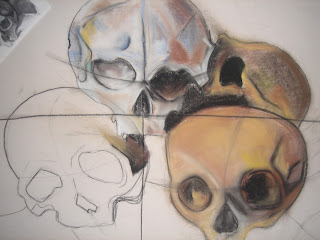
More progress on the second skull.
The second skull completed.
I then completed the skull in the back.
Progress on the final skull. I decided to leave the part of the skull where I drew through the other one. Leaving it there allows me to complete the drawing and still allow whoever looks at it to see my process.
The final skull completed.
 When I was doing the shading on the cloth underneath the skulls, I filled in the space with the color pastel I wanted and then went over it with a white one to blend it.
My completed Pyramid of Skulls. I darkened the lines I created in my first sketches, so the process I took in creating the original drawing is still clear.
Close-ups of the three skulls in front:

I began by sketching out the image.
I started by dividing my paper into four sections to help map out where each skull should be located. Then I sketched out the basic shapes.
Then I added outlines for where the facial features should go.
Then I got more specific with the shapes of the eye sockets and nasal bones.
I gave the skulls more detail as to where the shading would go.
This is the completed sketch.
Next I started to add shading and color.
Next, I started on the shading around the skull in the center and shaded the right eye socket.
More progress on the second skull.
The second skull completed.
I then completed the skull in the back.
Progress on the final skull. I decided to leave the part of the skull where I drew through the other one. Leaving it there allows me to complete the drawing and still allow whoever looks at it to see my process.
The final skull completed.
 When I was doing the shading on the cloth underneath the skulls, I filled in the space with the color pastel I wanted and then went over it with a white one to blend it.
My completed Pyramid of Skulls. I darkened the lines I created in my first sketches, so the process I took in creating the original drawing is still clear.
Close-ups of the three skulls in front:

Wednesday, February 2, 2011
Sighting Techniques
There are various sighting techniques that can be used to help drawings be more accurate and proportionate.
The first technique is Angle Transferring.
The second technique is using Plumb Lines.
The third technique is using Level Lines.
*Plumb Lines and Level Lines are equally important in making sure the final drawing is balanced and proportionate like the original objects.
The first technique is Angle Transferring.
- It is important to give a drawing the proper angles so the object is accurately represented. To do this, look at the subject and close one eye. Then hold the pencil up to the object and tilt it until it matches the angle being replicated. Then carefully lower the pencil to the paper and transfer the angle.
The second technique is using Plumb Lines.
- Plumb Lines are the vertical lines in the drawing. To make Plumb Lines, hold the pencil vertically up to the objects being drawn, and close one eye. Then compare how the objects relate to one another. Doing this aides in insuring that the drawing will be balanced properly.
The third technique is using Level Lines.
- Level lines are the horizontal lines in the drawing. They are used in the same way Plumb Lines are, only it compares how the objects relate to each other horizontally.
*Plumb Lines and Level Lines are equally important in making sure the final drawing is balanced and proportionate like the original objects.
Subscribe to:
Comments (Atom)


